Choose a format to download the design templates:
This is inspired by Darren Ellis and Toby Duncan, with some adjustments to simplify the construction.
Build your own
To make your own gauge, you’ll need:
- 1/4" plywood, MDF, or acrylic
- 1/8" plywood, MDF, or acrylic
- <1/8" flexible rubber or plastic
- 1/4" bolts & nuts (bat pins will work!)
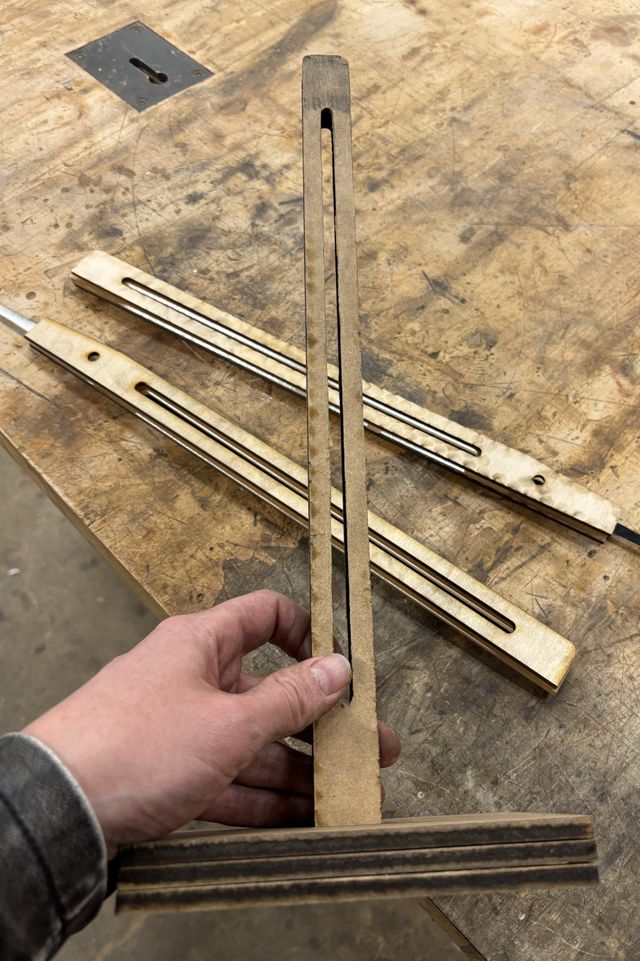
This requires a laser cutter, or some other way of cutting out the parts from a template. Maybe you’re good with a jig saw? Once you have the parts, you can fit and bolt them together. There’s no carving or gluing required.
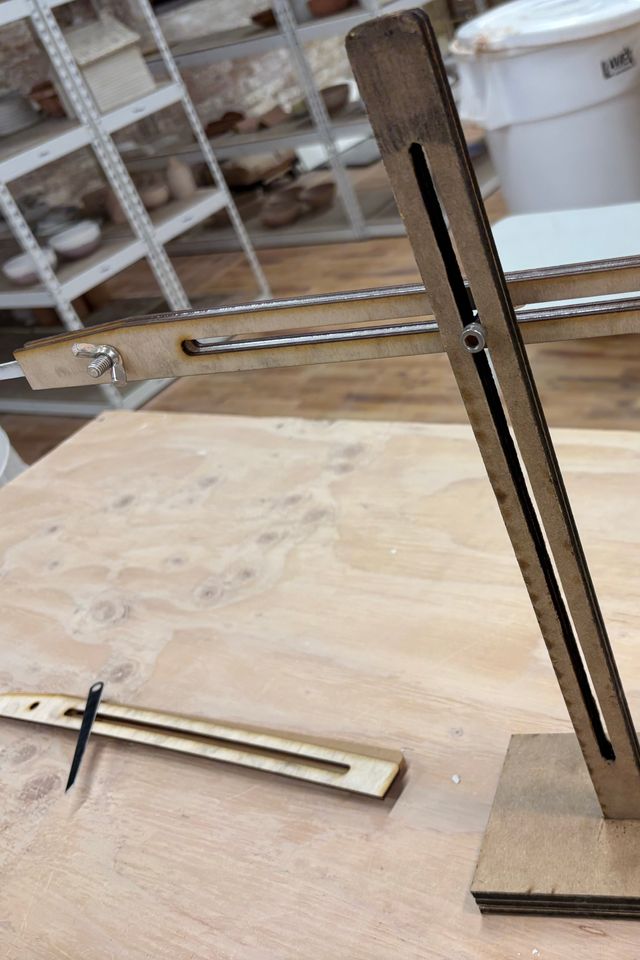
I made mine using whatever I could find in the scrap pile at my local maker space – a combination of 1/4" MDF, 1/8" plywood, 1/8" acrylic, and flexible magnetic sheeting for the pointers. It’s assembled entirely with bat pins and wing nuts.
None of the width measurements need to be precise, as long as they are consistent, so it should also be fine to do rough metric conversions as needed.
The frame
The frame is ideally made from thicker, more structural plywood. I cut three rectangles for the base, and slot two uprights through them in order to match the stepped foot design. I had to do some minimal sanding of the slots, but a tight fit is good. This frame is quick to assemble and disassemble, and the sliding-bolts for the pointer arms will provide additional structure.
The bottom base piece isn’t ‘held on’ by anything besides friction. That’s worked fine for me, but you can also fasten the layers together if you prefer. Glue, nails, screws, bolts – whatever you like. That’s optional.


The pointer arms
Each arm consists of a pointer and core sandwiched between outer plates. Darren recommends making the core from acrylic, and that’s working well for me. The essential thing is that the core must be slightly thicker material than the pointer. If there’s not enough space, it might be hard to adjust. But if there’s too much space, the pointer will flop around.
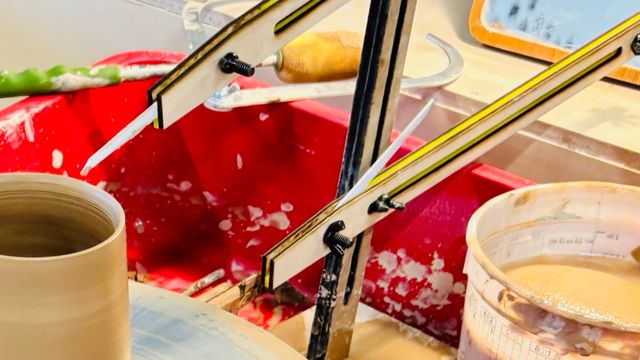
The pointer should be cut from something flexible, so it doesn’t damage your work. Rubber seems ideal, but I used scraps of magnetic sheeting, because I found some in the scrap pile. That’s been working fine for me.
Hardware
Each arm takes 3 bolt/nut pairs – one as an adjustable mounting point attaching the arm to the frame, one as a pivot for the pointer, and a final one at the back for stability. The mounting bolt should be over an inch long, with a wing nut for easy adjustments. The other two can be shorter, and don’t require quick access.
All these connection points are designed for 1/4" bolts. Standard bat pins (in the US) are 1/4 20 socket-head screws with wing nuts. You can get them from most pottery supplier, or any old hardware store. I designed it specifically so that these could be interchangeable with tools & equipment already in the studio, but any 1/4" bolts will work.
If you have different bat pins or bolts that you’d like to use, you might need to adjust the drawings. All the bolt holes and slots are 0.26" in my designs.
